Voice Assistant: Installation & Usage
This guide covers how to get it running on your hardware and walks through the difference between PROD and DEV modes, so you can choose the right setup for your use case.
Voice Assistant ships as a self-contained binary. Download it here: link
Once downloaded, unpack the archive.
Running Voice Assistant
The binary runs like any standard executable — no dependencies, no package manager, no install step.
Example for Raspberry Pi:
wget -c -nd http://192.168.178.240:3000/voice-control/prod-voice-assistant/releases/download/v1.0.9/voice-assistant-linux_aarch64.zip
unzip voice-assistant-linux_aarch64.zip
./voice-assistant-linux_aarch64
CLI Options
# ./voice-assistant-linux_aarch64 --help
Usage:
  voice-assistant-linux_aarch64 [--daemon|--foreground|--debug|--status|--stop|--help]

Options:
  --daemon      Start in background and suppress console output
  --foreground  Run in current console (debug mode)
  --debug       Enable debug mode (debug logs, debug files, debug pages)
  --status      Show whether background process is running
  --stop        Stop background process started by --daemon
  --help, -h    Show this help
  /?, -?        Help aliases (quote '/?' in zsh)
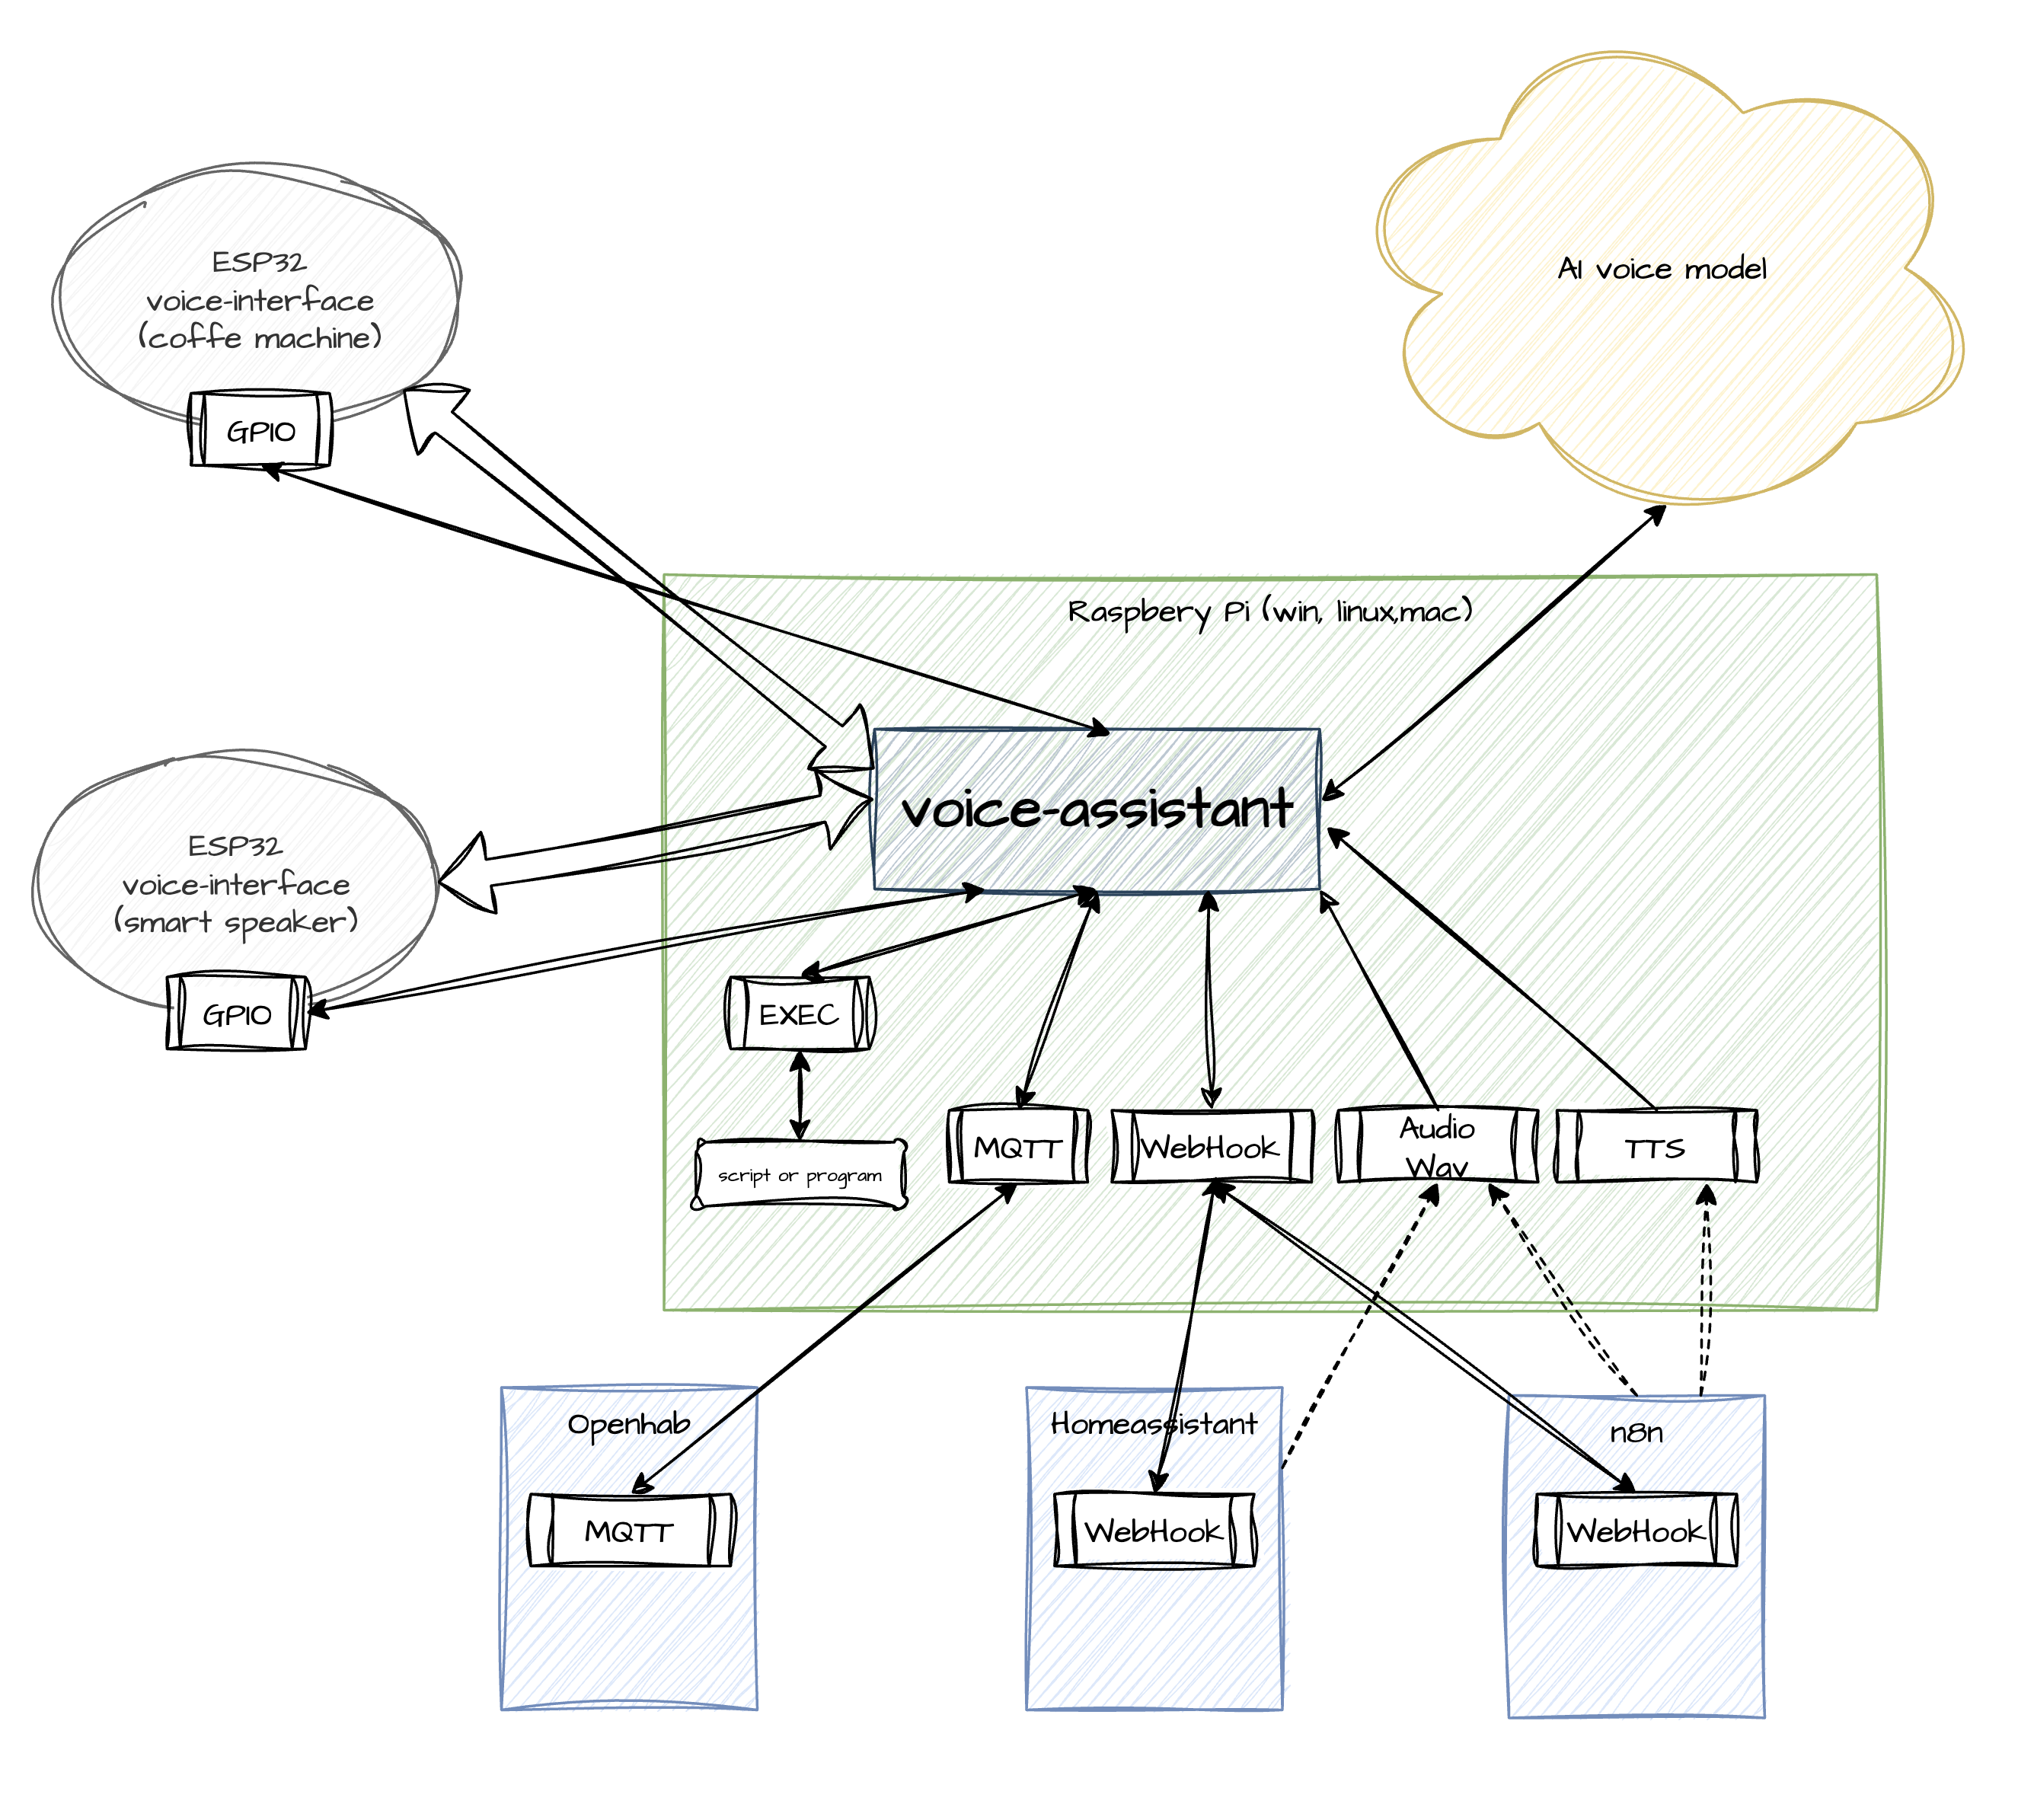
Two Operating Modes: DEV and PROD
PROD Mode
PROD is the default operating mode and gives you access to the full feature set:
- Connection to a stable, fully-featured model
- Web search integration
- Unlimited concurrent connections
- Compressed traffic between Voice Assistant and the model
- Simple, predictable billing (per-second pricing)
- Server-side AI VAD
- Multi-stage audio processing pipeline (NS + VAD) — significantly reduces false triggers
- No need to track model version changes
- Your data is never used for model training
In PROD mode, Voice Assistant always connects to the latest stable model version — version tracking and naming changes are handled on the service side. Billing is normalized into straightforward per-second metrics, so there's no need for a Google Cloud corporate account or time spent wiring up service-level cost tracking.
This mode is enabled by default. On startup, Voice Assistant checks for environment variables and a .env file. If MQTT credentials are present, they'll be used automatically.
Example .env with MQTT configured:
MQTT_SERVER=192.168.1.200
MQTT_PORT=1883
MQTT_CLIENT_NAME=voice-assist
MQTT_USERNAME=your_account_name
MQTT_PASSWORD=your_account_password
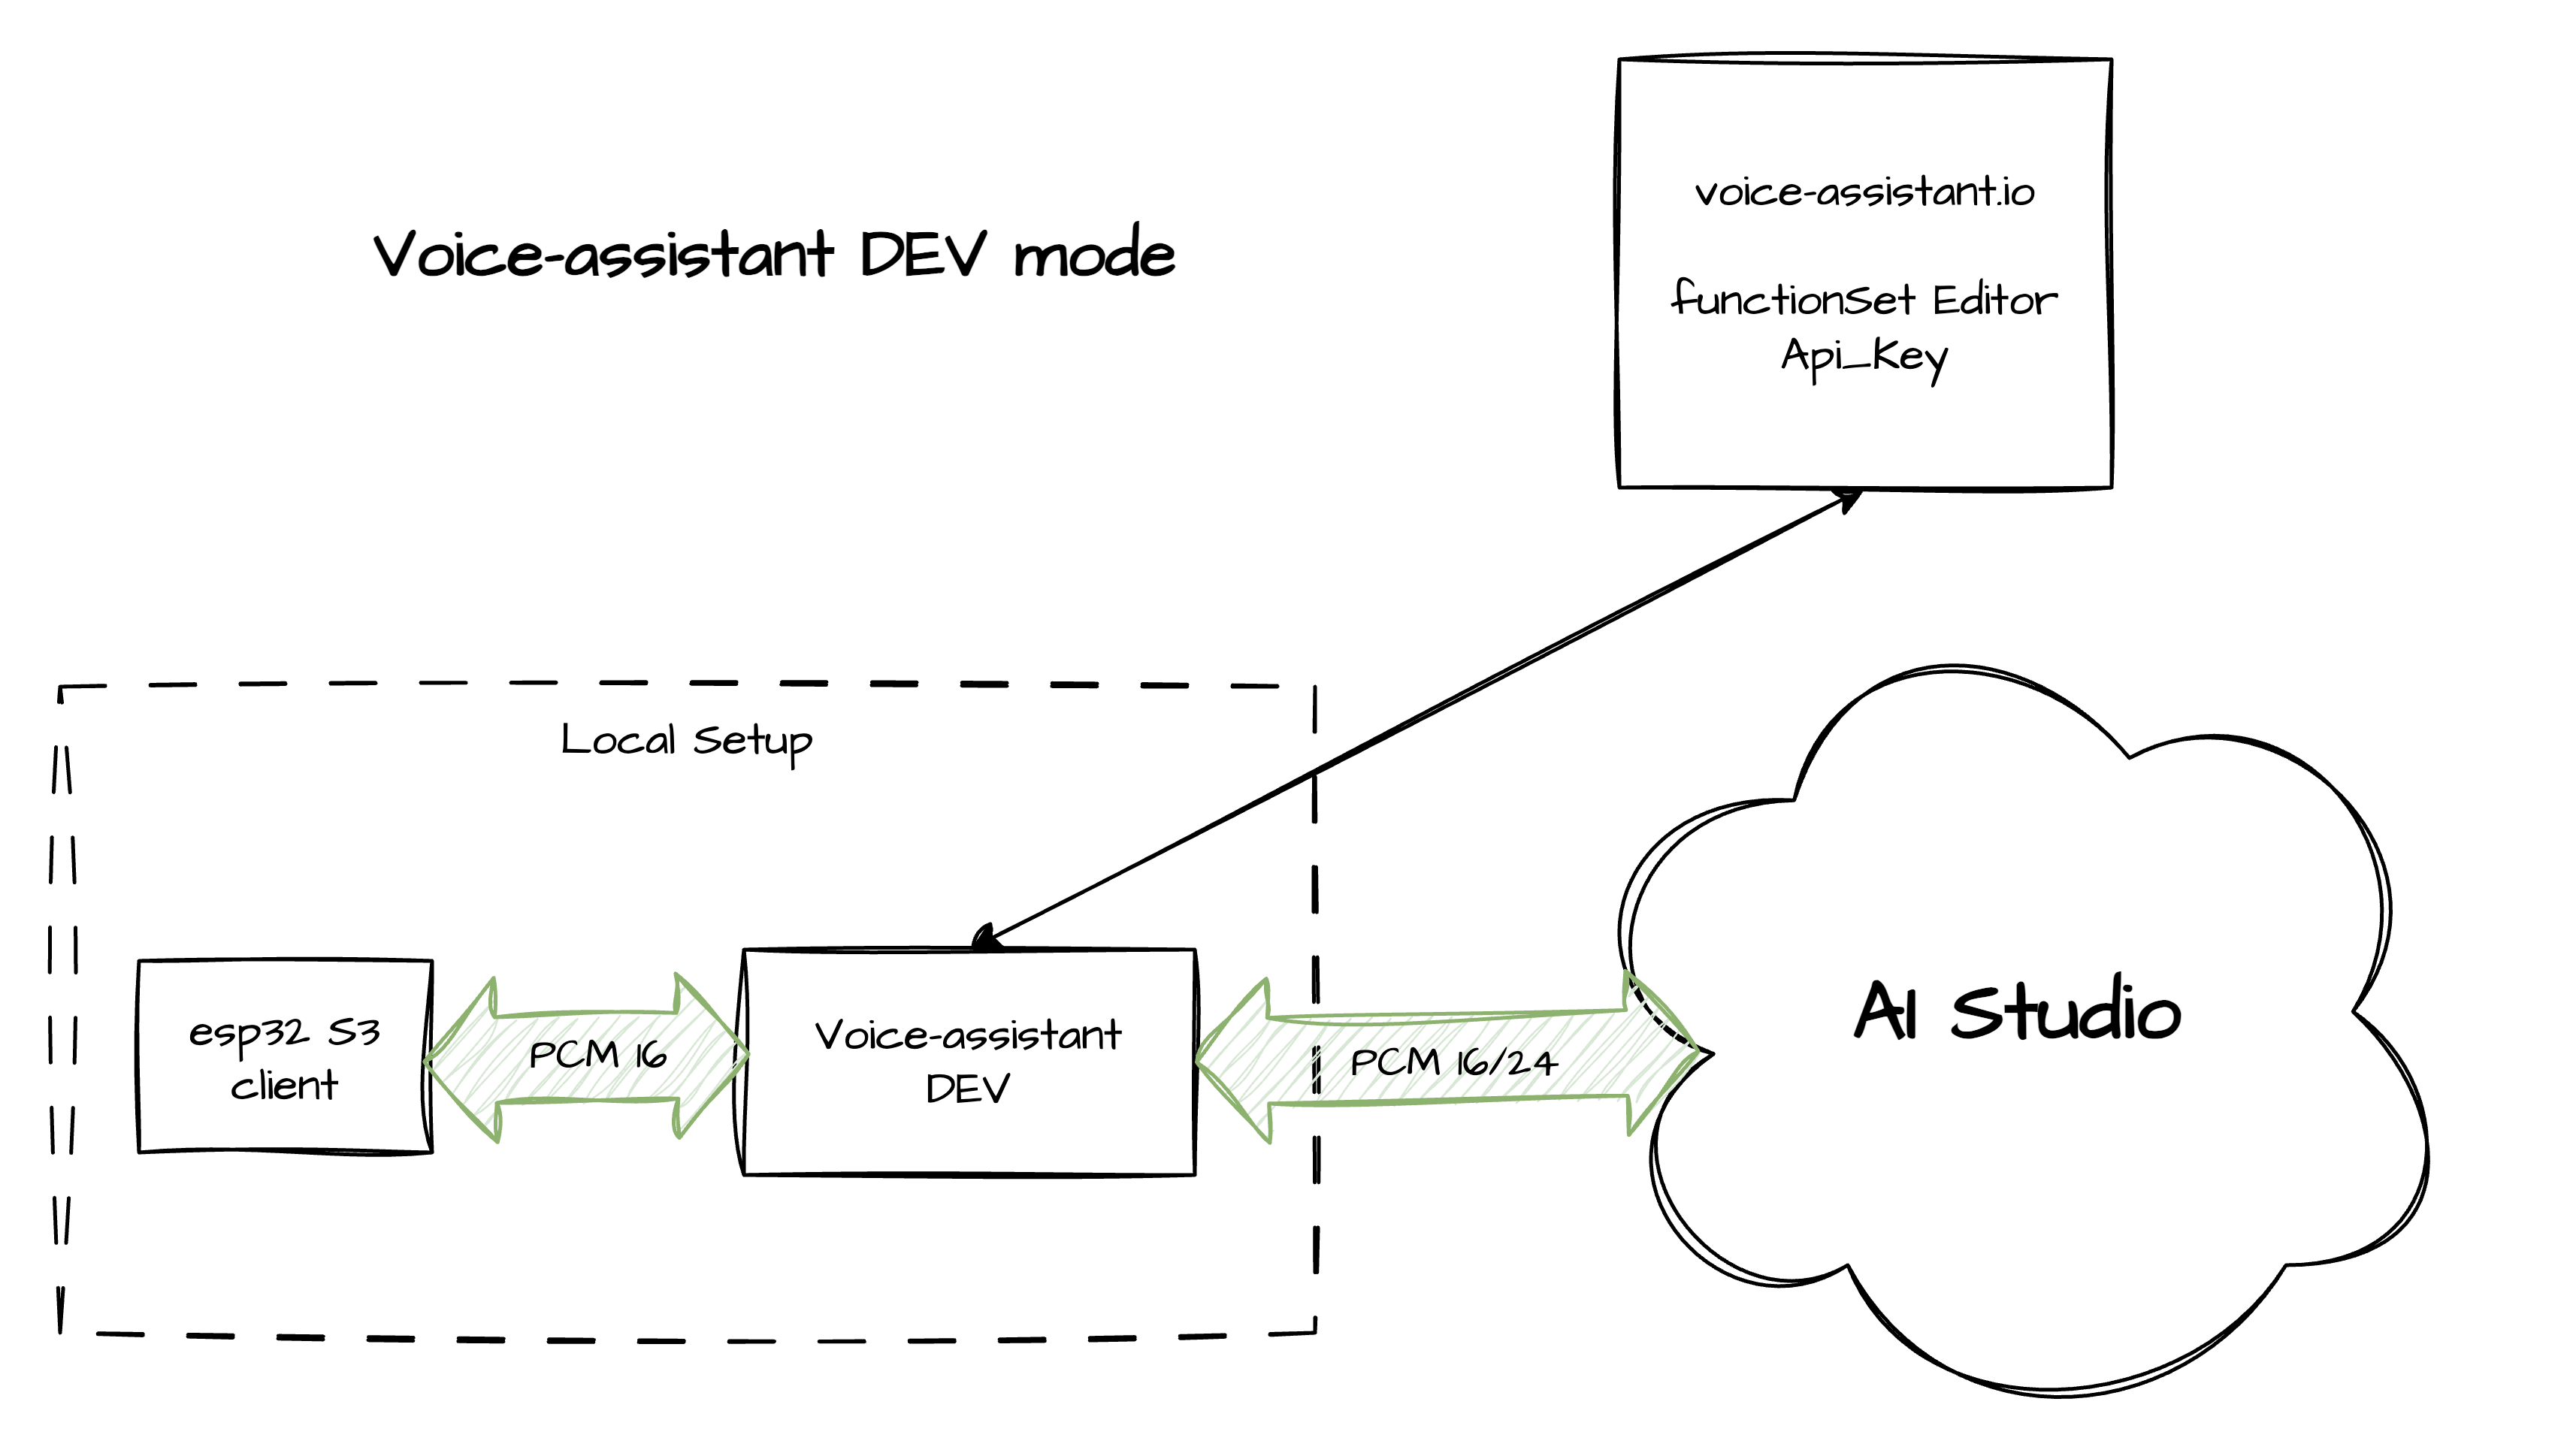
DEV Mode
DEV mode is for debugging individual devices without burning tokens from your account. In this mode, Voice Assistant connects directly to the model via Google AI Studio. Your function set defined in the dashboard remains editable.
Known limitations in DEV mode:
- Requires your own AI Studio API key (configured in settings)
- You're responsible for tracking model name changes yourself
- The models themselves can be unstable — unexpected disconnects, no web search, incorrect function call behavior, etc.
- Per Google's policy, your data may be used for model training
- Higher bandwidth usage — model connection requires 800 Kbps or more
- Heavy usage may incur additional charges
DEV mode is intended purely for device setup and integration testing — it lets you iterate on hardware without touching your token budget.
To activate DEV mode, add the following to your .env:
# DEV mode
ASSISTANT_MODE=DEV
DEV_MODEL_NAME=gemini-2.5-flash-native-audio-preview-09-2025
STUDIO_API_KEY=<your API key from AI Studio>
To get an API key, open the "Get API key" menu in AI Studio and generate one. Full instructions: AI Studio instructions
For the correct Live API model name, refer to the official guide
Heads up: Always restart Voice Assistant after changing the mode or any configuration values.